You won’t believe your empty mason jars or newspapers could be useful in the garden until you see the list of garden hacks below. After reading the article, you can take advantage of your old items lying in mess around your kitchen or garage, and then turn them into helpful things for your garden. Now, instead of throwing them out, let’s save them and give them new missions, they promise to keep you amazed.
They are ready to lie into the trash but they have gardening powers if you know the ways to use them. They also are easy to make at home with a few steps, and little effort. They can be a small greenhouse, utility fruit picker, vegetable markers, or a self-watering planter…, all are great ideas for your garden. Save them and try some for your garden right now. Here we go!
gardening solutions, consider repurposing old bicycle wheels to craft a zero-dollar trellis for your garden. This ingenious DIY project not only adds a touch of whimsy to your outdoor space but also provides valuable support for climbing plants, transforming your garden into a lush and green paradise.
Materials needed: Old bicycle wheel(s), paint (optional), brushes (if painting), screws and anchors (for mounting), garden twine or wire (for plant support).
How to make:
- Step 1: Clean the old bicycle wheel(s) thoroughly, removing any dirt or rust. If desired, paint the wheels with your chosen color. Allow them to dry completely.
- Step 2: Select a suitable location in your garden where you want to install the trellis. Ensure it’s near the climbing plants you intend to support.
- Step 3: Attach the bicycle wheel(s) securely to a fence, wall, or sturdy wooden posts using screws and anchors. Make sure they are at a height that allows your plants to climb freely.
- the hose/tubing in place and prevent it from moving or kinking.
#4 Plastic Bottle Fruit Picker

It is a simple and DIY (do-it-yourself) tool used for harvesting fruits from trees, especially those that are out of reach. It is made by attaching a plastic bottle to the end of a long pole or stick, creating a makeshift basket or receptacle to collect fruit.
It’s a useful tool for home gardeners and can help reduce the risk of injury from climbing trees or using ladders to reach high branches. Additionally, it allows you to collect fruit gently to avoid bruising or damaging the produce.
Materials needed: A plastic bottle with a screw-on cap (2-liter or similar size), a sturdy wooden or metal pole (approximately 4-6 feet long), a sharp knife or scissors, a screwdriver or drill, strong adhesive or epoxy (optional).
How to make:
- Step 1: Using a sharp knife or scissors, carefully cut a hole near the top of the plastic bottle, leaving enough space to insert the pole through. Make sure the hole is large enough to fit the pole snugly.
- Step 2: Attach the bottle to the pole, and insert the pole through the hole in the plastic bottle. The bottle should slide down the pole, with the cap end facing upward. If the bottle is loose on the pole, you can use strong adhesive or epoxy to secure it in place, ensuring it won’t slide off during use.
To use your plastic bottle fruit picker, simply position the bottle beneath a fruit on a high branch. Reach up and gently twist or tap the fruit with the bottle’s opening, causing it to drop into the bottle.

Source: Pakovska
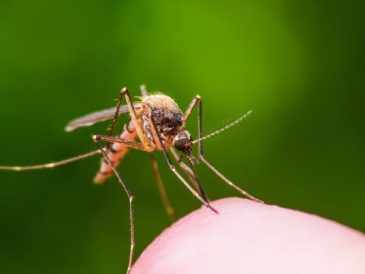
In some cases, cabbages look so mighty strong, but there is a cabbage fly that can easily destroy all your crops. That is the reason why it’s advised that you put insect nets around the cabbages and some collars around their stem. You can make these collars from some old thick plastic mixed with fabric sheets.
Besides, you can make them from just about anything that’s a bit thick and will keep in place and will be able to face rain showers and wind.
It’s very simple to make, you cut a circle from some sturdy material, and you cut the circle through halfway. When you reach the middle, you start cutting some small cuts in a circle shape. You do this so that the cabbage can grow during the period that the collar is still on, but at the same time, it will keep the collar closed off against the egg-laying flies during periods when the stem is still thin.
After you have placed them around the stem, you should press them onto the soil firmly so that there is no air between the collar and the cabbage.
This method manages and reduces pests in your garden without relying on synthetic chemicals. It is not only safer for the environment and beneficial insects but also promotes healthier and more sustainable gardening practices.
- Step 1: Cut around your bottle so that you have 2 or 3 rings, each around 10-20cm).
- Step 2: Cut spikes onto one side of each plastic ring.
- Step 3: Fold each of the spikes down sideways so that they stick out horizontally.
- Step 4: Place your DIY slug collar over your seedling and make sure it’s pushed down into the ground.
#9 Another Way To Prevent Young Plants From Cutworm Damage
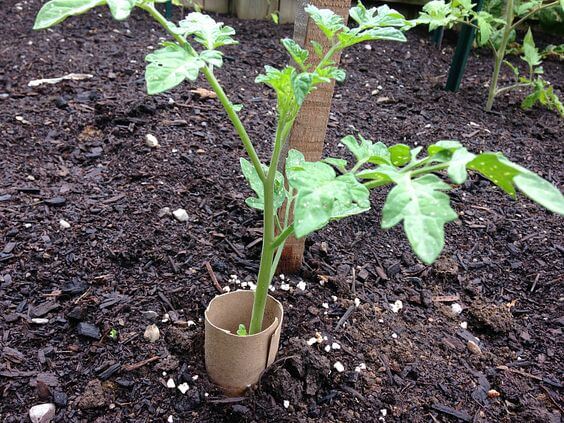
Source: Hobbyfarms
As soon as you’ve planted tomato, pepper, sunflower, or other young plants in the ground, use a 3-inch piece of cardboard from a toilet paper or paper towel roll to create a protective barrier. Simply cut the cardboard tube into sections and split them open lengthwise.
Gently wrap one of these cardboard sections around each plant, ensuring that the bottom of the tube is pushed into the soil by about an inch. Cutworms tend to move just below the surface of the soil, so this method keeps them away from the plant’s stem.
In addition to using physical barriers like collars or barriers made of materials like copper tape. By implementing one or more of these methods, you can effectively prevent cutworm damage to young plants in your garden and promote healthy growth.
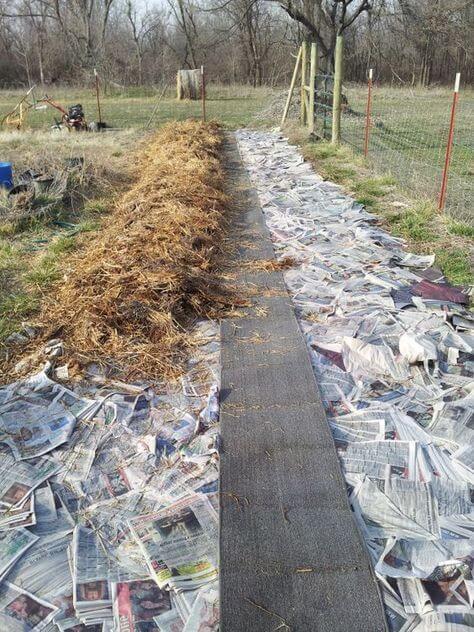
10 Goodbye Weed
Source: Gentlysustainable
Getting rid of weeds in your garden or yard can be a persistent challenge, but with the right strategies and persistence, you can effectively control and minimize weed growth. Using newspapers to protect plants from weeds is an effective and environmentally friendly method while also helping to retain moisture in the soil.
Materials needed: Newspapers (black and white pages without colored ink), mulch (optional).
How to make:
- Step 1: Remove any existing weeds or grass around your plants
- Step 2: Collect old newspapers with black and white pages and without colored ink. Avoid using glossy or colored pages, as they may contain chemicals that can be harmful to plants.
- Step 3: Spread a layer of newspapers around the base of your plants. Overlap the newspaper sheets to ensure thorough coverage. The newspaper layer should be about 2-3 sheets thick. This thickness helps prevent weeds from growing through.
- Step 4: Lightly moisten the newspaper layer with water to help it conform to the ground and stay in place.
- Step 5: For added weed suppression and a more polished look, you can cover the newspaper layer with a 2-3 inch thick mulch such as wood chips, straw, or compost.