Want to turn a few store-bought dates into palm babies? You can. Date palms (Phoenix dactylifera) germinate reliably with warmth, depth, and patience. Below is a practical, step-by-step plan from seed to pot to ground, with pro tips for better success—especially in climates with cool winters.
Quick Overview (What You’ll Do)
- Select & prep seeds: Clean, soak 24–48 hours, (optional) lightly scarify, then pre-sprout warm.
- Sow deep in a tall pot: Use a fast-draining, sandy mix; keep 26–32 °C.
- Grow the seedling: Give strong light, careful watering, and magnesium/iron if leaves yellow.
- Up-pot gradually: Always use deep pots to fit the long taproot.
- Harden off & plant out: After nights stay > 15 °C, in a raised, well-drained spot. Protect the first winters if you have frost.
Before You Start: Reality Check & Varieties
- Seed-grown palms are unique. They won’t be identical to the fruit you ate.
- Date palms are dioecious. You’ll need at least one male and one female for fruit. With seed-grown trees, you won’t know sex for years.
- Climate matters. Dates love long, hot, dry summers and mild winters. Mature trees can survive brief light freezes, but young palms hate frost. If your winters dip below -5 °C, plan on overwintering in a large container or serious winter protection outdoors.
Materials
- Ripe dates with intact seeds (Medjool, Deglet Noor, etc.)
- Warm water (and a thermos or seed heat mat)
- Optional but recommended: 3% hydrogen peroxide for seed hygiene; a nail file for gentle scarification
- Tall nursery pots / treepots (at least 15–25 cm deep to start)
- Growing mix: 40% coarse sand + 30% perlite + 30% coco coir/peat (pH ~6–7.5)
- Clear bag or humidity dome (for germination)
- Thermometer/soil probe & seedling heat mat (for steady 28–30 °C)
- Slow-release palm fertilizer or dilute liquid feed (with Mg + micronutrients)
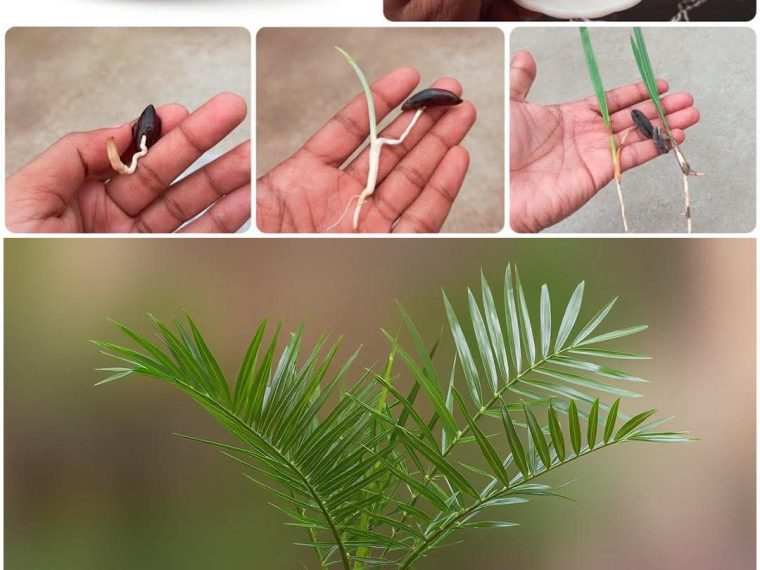
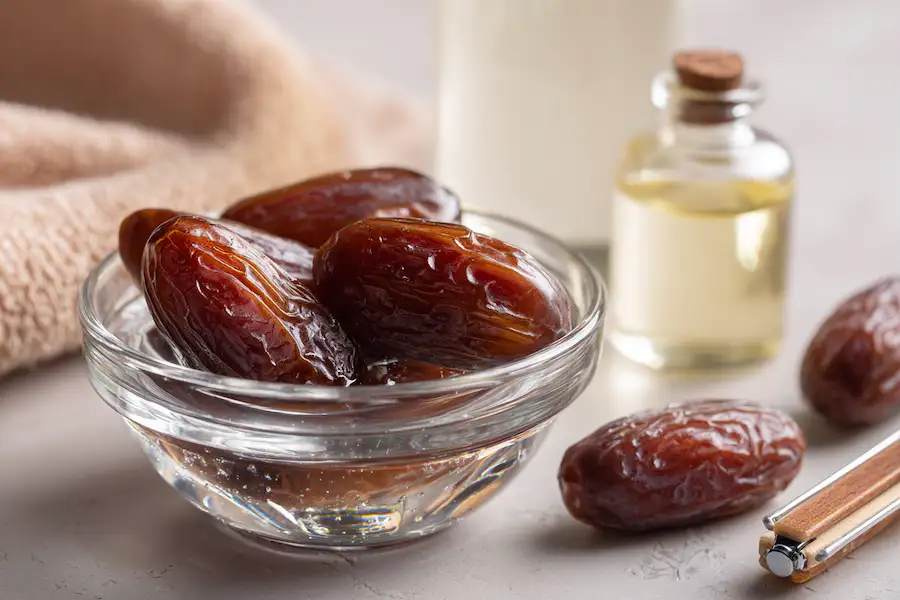
Step 1 — Select, Clean, and Wake the Seeds
- Pick viable seeds. Avoid seeds that are cracked or crushed. Dates from most grocery stores are fine; seeds remain viable even when fruits are dried.
- Clean thoroughly. Rinse off all fruit sugars (they can encourage mold).
- Sanitize (optional but helpful): Soak 10 minutes in 3% hydrogen peroxide, then rinse.
- Long soak: Put seeds in warm water (35–40 °C) for 24–48 hours. Change water once. The warmth hydrates the seed and speeds germination.
- Optional micro-scarification: With a nail file, very lightly scuff one end of the seed until the shine just dulls. Don’t gouge.
Pro tip: Keep the soak water warm by using a thermos or a jar in a warm spot near (not on) a radiator or on a heat mat set low.
Step 2 — Pre-Sprout the Smart Way (Fastest)
Two reliable methods:
- Baggie/Towel Method
- Wrap soaked seeds in a barely damp paper towel, slide into a zip bag, leave partly open for air, and place at 28–32 °C.
- Check every 2–3 days for the first root (radicle). Re-moisten if towels dry; if mold appears, rinse seeds and rewrap with a fresh towel.
- Vermiculite Cup Method
- Fill a cup with moist (not wet) vermiculite, bury seeds 1–2 cm deep.
- Keep 28–32 °C. Germination often begins in 2–8 weeks (some take longer).
When to pot: As soon as you see a 1–3 cm root emerging, move to a tall pot. Don’t wait for long roots that can snap.
Materials
- Ripe dates with intact seeds (Medjool, Deglet Noor, etc.)
- Warm water (and a thermos or seed heat mat)
- Optional but recommended: 3% hydrogen peroxide for seed hygiene; a nail file for gentle scarification
- Tall nursery pots / treepots (at least 15–25 cm deep to start)
- Growing mix: 40% coarse sand + 30% perlite + 30% coco coir/peat (pH ~6–7.5)
- Clear bag or humidity dome (for germination)
- Thermometer/soil probe & seedling heat mat (for steady 28–30 °C)
- Slow-release palm fertilizer or dilute liquid feed (with Mg + micronutrients)
Step 1 — Select, Clean, and Wake the Seeds
- Pick viable seeds. Avoid seeds that are cracked or crushed. Dates from most grocery stores are fine; seeds remain viable even when fruits are dried.
- Clean thoroughly. Rinse off all fruit sugars (they can encourage mold).
- Sanitize (optional but helpful): Soak 10 minutes in 3% hydrogen peroxide, then rinse.
- Long soak: Put seeds in warm water (35–40 °C) for 24–48 hours. Change water once. The warmth hydrates the seed and speeds germination.
- Optional micro-scarification: With a nail file, very lightly scuff one end of the seed until the shine just dulls. Don’t gouge.
Pro tip: Keep the soak water warm by using a thermos or a jar in a warm spot near (not on) a radiator or on a heat mat set low.
Step 2 — Pre-Sprout the Smart Way (Fastest)
Two reliable methods:
- Baggie/Towel Method
- Wrap soaked seeds in a barely damp paper towel, slide into a zip bag, leave partly open for air, and place at 28–32 °C.
- Check every 2–3 days for the first root (radicle). Re-moisten if towels dry; if mold appears, rinse seeds and rewrap with a fresh towel.
- Vermiculite Cup Method
- Fill a cup with moist (not wet) vermiculite, bury seeds 1–2 cm deep.
- Keep 28–32 °C. Germination often begins in 2–8 weeks (some take longer).
When to pot: As soon as you see a 1–3 cm root emerging, move to a tall pot. Don’t wait for long roots that can snap.
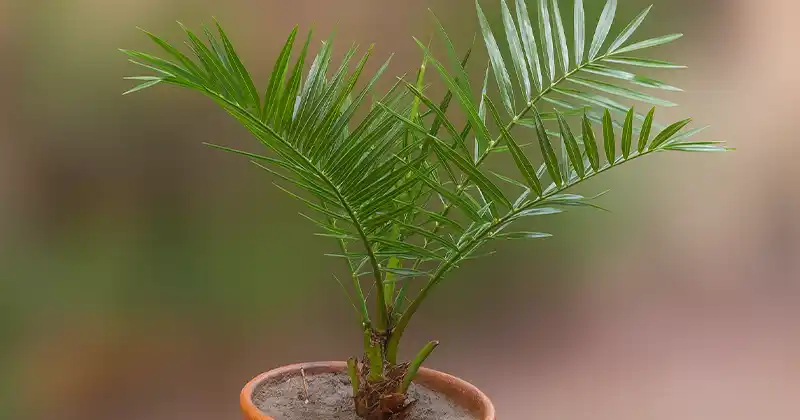
Step 3 — Potting Mix & Container That Palms Love
- Use depth. Date palms push a strong taproot first. Shallow pots = root bind and stalled growth. Start with 15–25 cm deep pots; move to 30–40 cm as they grow.
- Mix for drainage: 40% coarse sand + 30% perlite + 30% coco/peat. It should feel gritty and airy.
- Planting depth: Lay the sprouted seed on its side, root down, 2–3 cm deep. Cover lightly.
- Water-in once to seat the mix; then let excess drain completely.
Pro tip: Fabric “air-pruning” pots prevent circling roots and keep drainage excellent.
Step 4 — Heat, Light, and Water (Your Early “Care Recipe”)
- Heat: Soil 26–32 °C until leaves appear. A heat mat with a thermostat pays off.
- Light: Bright, indirect light at first; after the first leaf, increase to several hours of direct sun daily (gradually, to prevent scorch).
- Watering: Let the top 2–3 cm of mix dry between waterings. Water deeply but infrequently; never leave water in the saucer.
- Humidity: Not fussy, but steady room humidity (40–60%) reduces stress.
- Feeding: After the second leaf, start very dilute liquid feed every 2–3 weeks or use a low-dose slow-release palm fertilizer. Ensure magnesium and micronutrients are present.
Signs to watch:
- Pale/yellow bands → often magnesium deficiency (add a small dose of Epsom salts monthly).
- General chlorosis with green veins → likely iron deficiency (use chelated iron).
Step 5 — Up-Potting Without Stress
- Timing: When roots reach the bottom holes or growth slows, move up one size (don’t jump to a giant pot).
- Handle the spear carefully. Palms have a single growing point (the inner spear); damaging it can kill the plant.
- Keep the crown high. Replant at the same depth; don’t bury the crown.
- Water once; then dry cycles. After up-potting, resume deep-but-infrequent watering.
Step 6 — Hardening Off (Absolutely Do This)
Before planting outside, give the palm 10–14 days to adapt:
- Day 1–3: Bright shade outdoors, wind-sheltered (1–2 hours gentle morning sun).
- Day 4–7: 3–4 hours morning sun; protect from midday.
- Day 8–14: Extend sun exposure gradually to the site’s full sun conditions.
Temperature rule: Don’t start hardening off until nights stay above 12–15 °C.
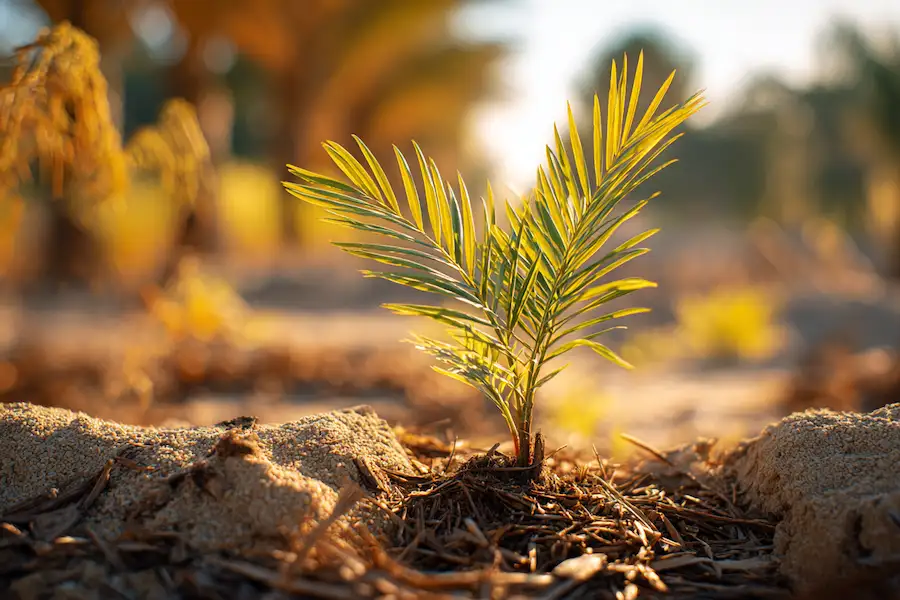
Step 7 — Planting Outdoors (Drainage Is Everything)
- Best timing: Late spring to early summer—after soil warms to ~18 °C and frost risk is gone.
- Choose a microclimate: South-facing wall, reflected heat, wind protection, zero winter shade if possible.
- Soil prep:
- Build a raised mound or bed for drainage.
- Mix native soil with coarse sand and grit/perlite (aim for a sandy loam).
- Planting:
- Dig a hole just wider than the root mass (don’t over-disturb roots).
- Set the palm at the same depth as in the pot, crown above grade.
- Backfill, firm gently, and water thoroughly once.
- Mulch: 5–8 cm ring kept away from the trunk. Mulch conserves moisture but never bury the crown.
Spacing for future fruit: If you’re planting several, give 4–6 m between trees. Fruit requires at least one male nearby for pollination.
Step 8 — After-Planting Care (First 2 Years)
- Water: Deeply once a week in hot weather; every 10–14 days in mild weather, adjusting to rainfall and soil. The goal is even moisture, never soggy.
- Feeding: 2–3 light feedings per growing season with a palm fertilizer that includes K, Mg, Fe, Mn.
- Weed control: Keep a clean, mulched circle around the trunk to reduce competition and pests.
- Monitoring:
- Spear pull (center leaf comes out with a tug) signals rot; treat immediately (see Troubleshooting).
- Frond tips browning often means salts or drought stress; flush the soil and adjust watering.
Winter Protection (Cool/Cold Climates)
Young date palms are the most vulnerable. For winters with freezing nights:
- Dry is warm. Keep the spear/trunk dry in winter with a breathable rain cap (e.g., fleece + small roof).
- Wrap lightly before freezes: Use frost fleece around the crown; fill the center with dry leaves or straw, then cover with breathable fabric (avoid plastic touching leaves).
- Insulate the root zone: Renew mulch (10–15 cm), keeping it off the trunk.
- Heat only if necessary: In severe snaps, a low-watt wrap (heat cable) around an inner frame can save a young palm—monitor temps carefully.
- Container option: In harsher climates, keep in a large pot and move to a bright, cool (5–12 °C) space for winter rest. Water sparingly.
Pollination & Fruiting (Long-Term)
- Timeline: Seedlings may take 7–10+ years to show flowers.
- Sexing: You’ll only know male vs female when they flower.
- Hand pollination: If you’re lucky to have both sexes, transfer pollen from male flower stalks to female flowers for reliable fruit set.
Troubleshooting & Fix-It Fast
- No germination after 10–12 weeks: Keep warm; re-soak briefly in warm water; refresh medium. Some seeds are slow and can take months.
- Mold on seeds: Rinse, hydrogen-peroxide dip, rewrap in fresh towel/medium with more air flow.
- Spear pull (crown rot): Remove loose tissue, pour 3% hydrogen peroxide into the crown until fizzing stops; drain. Keep it dry and warm. Repeat every few days until firm growth resumes.
- Yellow leaves (Mg/Fe deficiency): Add Epsom salts at low dose monthly + a chelated iron drench. Ensure pH ~6–7.5.
- Brown tips: Usually salts or underwatering. Flush the pot thoroughly, then resume deep/less-frequent watering.
- Pests (scale, spider mites): Wipe with insecticidal soap; for mites, increase humidity, then treat with repeated soap/neem applications (weekly x 3). Always test a leaf first.
Pro Tips & Little Upgrades That Make a Big Difference
- Warmth = speed. A thermostat-controlled heat mat (28–30 °C) often halves germination time.
- Depth first. Date roots dive before tops thrive—tall pots outrank wide pots every time.
- Water quality. If your tap water is hard/salty, alternate with rain or distilled water to prevent leaf burn and salt buildup.
- Don’t bury the crown. Keeping the crown high and dry avoids 90% of rot problems.
- Sun acclimation. New leaves scorch easily—harden off without rushing.
- Microclimate engineering. In marginal climates, a south wall + dark gravel mulch can add several degrees of heat.
- Multiple seeds, staggered times. Germinate a batch; plant in intervals. It gives you backups and a longer window to select the strongest seedlings.
- Record keeping. Note dates, temps, and mixes. Your second batch will be even better.
Simple Timeline (Typical)
- Week 0: Clean + soak seeds, start pre-sprout warm.
- Weeks 2–8: First roots show (some sooner, some later).
- Month 2–3: First strap leaf in pots.
- Month 4–6: Second/third leaves; first up-pot.
- Late Spring–Summer (Year 1): Harden off & plant out (if climate allows).
- Years 2–3: Establishment, trunk slowly thickens.
- Year 7–10+: Possible flowering/sex reveal, then fruiting with pollination in suitable climates.
Frequently Asked Questions
Can I plant seeds directly outdoors?
Only in reliably warm climates. You’ll get faster, safer results by pre-sprouting and potting first.
Will it fruit where I live?
Fruit demands long, hot summers and mild winters. In cooler regions, expect a handsome palm more than a harvest—unless you provide greenhouse-level heat/light.
What’s the best fertilizer?
A palm-specific product with K, Mg, and micronutrients. Light, regular feedings beat heavy, rare ones.
How many seeds should I start?
Start at least 5–10. You’ll select the strongest and increase chances of eventually having both sexes.
At-A-Glance Recipe Card
- Pre-sprout: Soak 24–48 h → warm (28–32 °C) baggie/vermiculite till root 1–3 cm
- Pot: Tall container, sandy/gritty mix, seed 2–3 cm deep
- Care: Heat 26–32 °C, bright → full sun (gradual), deep/infrequent watering
- Feed: Light, frequent, with Mg + Fe
- Move up: One pot size at a time; keep crown above soil
- Outdoors: After warm nights, raised, well-drained site, mulch (not on trunk)
- Winter: Keep crown dry; wrap or overwinter indoors if freezing
Inspired by this? Share the article with your friends!