🌿 How to Make a Wattle Raised Garden Bed
A Rustic & Eco-Friendly Gardening Project
Wattle raised garden beds are not only charming and rustic but also eco-conscious and inexpensive. Using woven sticks (usually from pruning or fallen branches), this ancient technique transforms simple materials into strong, functional, and visually appealing garden structures.
Let’s walk you through the process from start to finish.
🪵 What Is a Wattle Garden Bed?
A wattle bed is a type of raised garden bed made by weaving pliable branches (like willow, hazel, or grapevine) between upright stakes, forming a natural basket-like wall. It’s an age-old technique that dates back to medieval Europe and is still popular today for its sustainability and aesthetic.
🛠️ Materials You’ll Need:
- Stakes or Upright Posts
- Hardwood stakes (1–2 inches thick, 12–24 inches long)
- Can be from bamboo, oak, hazel, etc.
- Wattle (Weaving Material)
- Long, flexible branches: willow, grapevine, hazel, forsythia, etc.
- Roughly ½–1 inch thick and 3–6 feet long
- Hammer or mallet
To drive stakes into the ground - Pruners or loppers
To trim branches to size - Optional: Compost, soil, mulch, and cardboard/newspaper
For filling and planting
📏 Step-by-Step Instructions
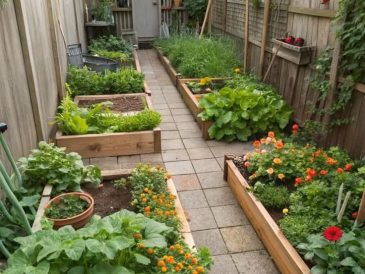
Step 1: Choose a Site & Layout
- Pick a sunny, level spot in your garden.
- Outline the shape of your bed using string, garden hose, or chalk. A simple rectangle or circle works best for beginners.
Tip: Standard height is 12–18 inches, but you can go higher depending on your needs.
Step 2: Install the Upright Stakes
- Drive stakes into the ground every 12–18 inches along your outline.
- Leave 6–8 inches above the ground to start, or more if making a taller bed.
- Make sure they’re sturdy and evenly spaced.
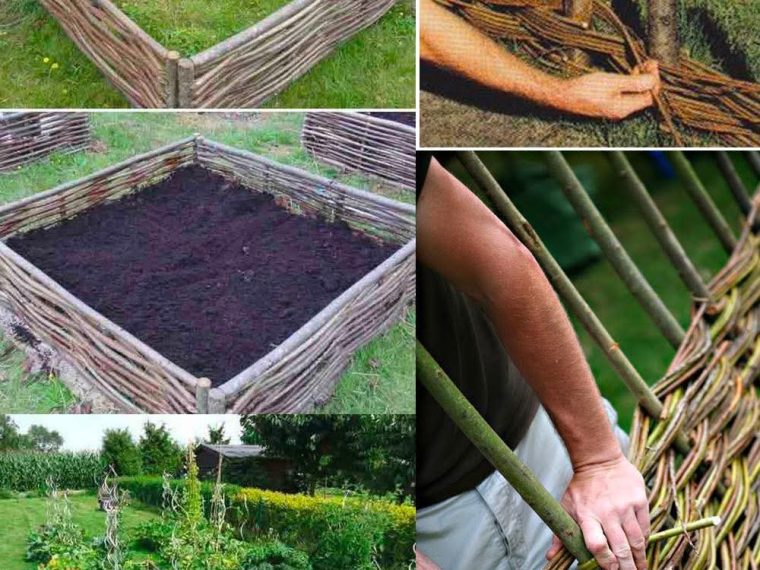
Step 3: Prepare & Soak Your Wattle Material
- If branches are dry, soak them in water overnight to make them flexible.
- Sort by length and thickness for easier weaving.
Step 4: Start Weaving
- Begin at the base: weave branches in and out around the stakes.
- Alternate the direction with each layer (left to right, then right to left).
- Push each new branch down tightly to compact the wall.
💡 Trim excess ends as you go to keep it neat.
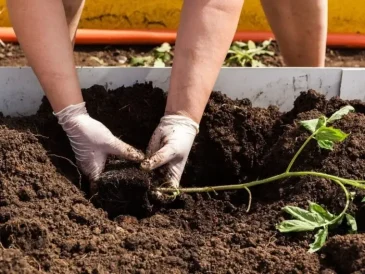
Step 5: Fill Your Bed
Once the walls reach your desired height:
- Lay cardboard or newspaper at the bottom to block weeds.
- Add alternating layers of:
- Garden waste or branches (bottom)
- Compost or rotted manure (middle)
- Rich topsoil (top)
This layered method (hugelkultur-inspired) provides excellent drainage and nutrition.
Step 6: Plant and Mulch
- Add your vegetables, herbs, or flowers.
- Top with mulch to retain moisture and reduce weeds.
🌼 Benefits of a Wattle Raised Bed
✅ Sustainable – Uses natural, local materials
✅ Affordable – Often free if you have access to branches
✅ Good Drainage – Raised structure prevents waterlogging
✅ No Nails or Screws – Fully biodegradable if needed
✅ Beautiful – Adds a rustic charm to any garden
🧺 Bonus Tips
- Use thicker branches for stakes, and younger, thinner branches for weaving.
- If your branches are brittle, soak them longer before weaving.
- Secure taller beds with extra horizontal support or cross-bracing.
Final Thoughts 🌱
Creating a wattle raised garden bed is a rewarding project that brings beauty and sustainability together. It’s a great weekend DIY that reconnects you with traditional gardening methods—and it’s gentle on both the environment and your wallet.