Lavender is a beautiful, fragrant, and versatile plant that adds a touch of elegance to any garden.
With its stunning purple blooms, soothing scent, and multiple benefits, it’s no wonder that so many gardeners love growing lavender.
But did you know that you can propagate lavender cuttings in just 2 minutes and grow new plants for free?
Propagating lavender is easy, cost-effective, and a great way to expand your garden without buying new plants.
In this guide, we’ll show you how to grow lavender from cuttings in just 2 minutes and why lavender is one of the best plants you can add to your garden.
Why You Should Grow Lavender in Your Garden
Before we dive into propagation, let’s explore why lavender deserves a spot in your garden.
1. Lavender Attracts Pollinators
Lavender is a magnet for bees, butterflies, and other beneficial pollinators. By planting lavender, you’re helping to support local wildlife and promoting a healthy ecosystem.
Best For: Supporting bee populations and encouraging biodiversity.
2. Lavender is Low-Maintenance & Drought-Tolerant
Lavender thrives in dry, well-drained soil and requires very little water once established. It’s perfect for water-wise gardening and great for areas with hot summers.
Best For: Busy gardeners who want a low-maintenance, resilient plant.
3. Natural Pest Repellent
Lavender naturally repels mosquitoes, moths, and flies, making it a great addition to patios, garden borders, and seating areas.
Best For: Creating a pest-free outdoor space without using chemical repellents.
4. Medicinal & Aromatherapy Benefits
Lavender is known for its calming properties and is often used in aromatherapy, essential oils, and herbal remedies.
It can help with:
- Reducing stress and anxiety
- Improving sleep quality
- Soothing skin irritations and burns
Best For: Anyone looking for natural wellness benefits.
5. Beautiful Year-Round & Deer-Resistant
Lavender remains evergreen in many climates and continues to add beauty and fragrance to your garden year-round. Plus, it’s deer-resistant, so you won’t have to worry about it getting eaten!
Best For: Adding color and fragrance while keeping deer away.
Why Propagate Lavender from Cuttings?
Growing lavender from seeds can take a long time and often produces weaker plants.
Propagating from cuttings is:
- Faster – Lavender cuttings root in 2-4 weeks, while seeds can take months.
- Reliable – Cuttings produce stronger, healthier plants identical to the parent plant.
- Cost-Effective – Grow more lavender for free instead of buying new plants.
What You Need to Propagate Lavender Cuttings
Before starting, gather these materials:
- A Healthy Lavender Plant – Choose a strong, disease-free plant.
- Sharp Scissors or Pruners – To make a clean cut without crushing the stem.
- A Small Pot with Well-Draining Soil – A mix of perlite, sand, and compost works best.
- Rooting Hormone (Optional) – Speeds up root growth and improves success rate.
- A Clear Plastic Bag or Humidity Dome – Helps retain moisture during rooting.
Now, let’s get to the 2-minute propagation process!
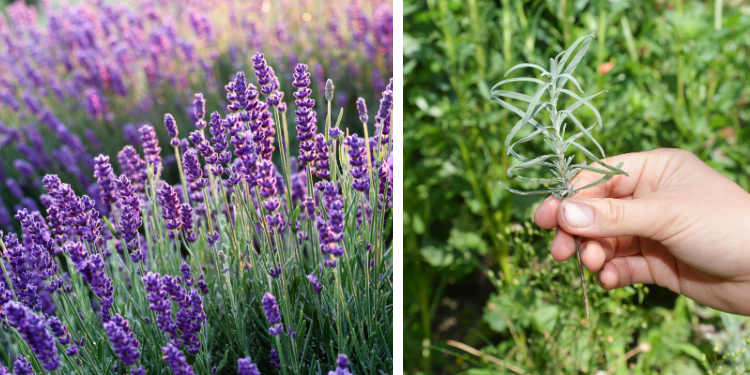
Step 1: Take the Perfect Lavender Cuttings (30 Seconds)
- Choose a healthy lavender stem that is not flowering (flowers take energy away from rooting).
- Cut a 4-6 inch (10-15 cm) stem just below a node (the bump where leaves grow).
- Remove the bottom leaves, leaving about 2 inches (5 cm) of bare stem.
Avoid woody stems! Soft, green stems root faster.
Step 2: Apply Rooting Hormone (Optional, But Recommended) (30 Seconds)
Dip the cut end into rooting hormone powder or gel.
Shake off excess powder before planting.
Skipping rooting hormone? No problem! Lavender can root naturally, but it may take a little longer.
Step 3: Plant the Cutting in Soil (30 Seconds)
Fill a small pot with well-draining soil (a mix of sand and compost works well).
Stick the cutting 2 inches (5 cm) deep into the soil.
Lightly press the soil around the base for stability.
Avoid overwatering! Lavender likes dry, well-drained conditions.
Step 4: Cover and Keep Moist (30 Seconds)
Lightly mist the cutting with water (don’t soak it).
Cover with a clear plastic bag or humidity dome to trap moisture.
Place in a bright, warm spot (indirect sunlight works best).
Avoid direct sunlight! Too much heat can dry out the cutting before roots develop.
Step 5: Wait for Roots to Develop (2-4 Weeks)
In 2-4 weeks, gently tug on the cutting—if you feel resistance, roots have formed!
Once rooted, gradually remove the plastic bag and start watering normally.
Be patient! Some lavender cuttings may take longer to root, especially in cooler temperatures.
Common Problems & How to Fix Them
Cuttings turning black? – Overwatering! Let the soil dry slightly between misting.
No roots after 4 weeks? – Try using rooting hormone or placing the pot in a warmer area.
Leaves turning yellow? – Too much humidity. Remove the plastic cover for a few hours daily.
Final Step: Transplant Your Lavender Outdoors
Once your cutting is well-rooted, it’s time to transplant it into your garden or a bigger pot.
Choose a sunny location with well-drained soil.
Space plants 12-18 inches apart for good air circulation.
Water sparingly—lavender hates soggy roots!
Propagating lavender from cuttings is super easy and takes just 2 minutes to set up!