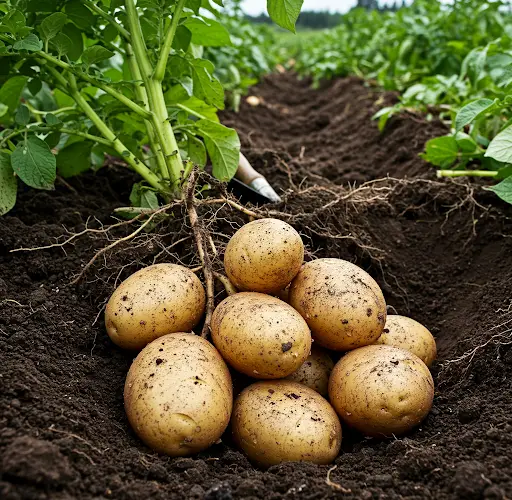
The long-awaited time has finally arrived—the season when we begin intensive work in the garden. Soon, everything will turn green and bloom, and we will eagerly walk around, tending to our plants, organizing our garden, and patiently waiting for the fruits of our labor. One of the first major tasks of the season is planting potatoes, which requires significant effort, especially for those with larger plots of land or a greater amount of planting material.
To stay on track with garden tasks, be sure to follow our channel, where we provide timely advice on planting, fertilizing, and protecting various plants. Today, we will walk you through our method of planting potatoes, covering every step from soil preparation to harvesting. If you find this guide helpful, please support us by sharing it on social media so others can also benefit from our tips.
Soil Preparation and Fertilization
Proper soil cultivation is best done in the fall, at which time manure should be incorporated into the soil. Manure decomposes over time, slowly releasing nutrients, ensuring the soil is in optimal condition by spring. However, if fall preparation was not possible, soil plowing and manure application can still be done in the spring. After adding manure, tilling or shredding the soil is necessary to ensure it is loose and well-aerated.
Well-prepared soil is essential for quick germination and root development, which in turn promotes even tuber emergence. Manure is the most common organic fertilizer used for potatoes, providing essential macronutrients such as nitrogen (N), phosphorus (P), and potassium (K), as well as beneficial micronutrients like copper, zinc, and manganese.
The benefits of organic fertilization with manure include increasing the soil’s humus content, which improves fertility and enhances its ability to retain moisture and nutrients. Additionally, soil enriched with manure warms up faster in early spring, which is crucial for the growth and development of potato sprouts.
While organic fertilization is crucial, mineral fertilizers are also important for achieving high yields. The optimal nutrient ratio for potatoes is 10:10:40 (N:P:K). A balanced supply of these elements maximizes yield potential and ensures healthy plant growth.
Planting Time and Depth
The best time to plant potatoes depends on the type of soil, location, and weather conditions. In lowland areas, the optimal planting window is from mid-March to early April, while in hilly and mountainous regions, planting typically occurs from early to late April. In greenhouses, planting can be done up to a month earlier under favorable conditions.
The planting depth is influenced by soil type, climate, and the size of the planting material. Typically, potatoes should be planted at a depth of 8-12 cm, ensuring they are covered with a 5-6 cm layer of soil. The quantity of seed potatoes required depends on their size, shape, and planting area.
Preparing and Cutting Seed Potatoes
For best results, germinating the seed potatoes before planting is highly recommended. If you are unfamiliar with the process, we have a separate video on our channel explaining how to do it effectively. Additionally, we have a video on cutting seed potatoes correctly, which can help you save money while ensuring high-quality planting material.
Select healthy, undamaged seed potatoes weighing 50-60 g. The size of the tubers determines their spacing in the row. If you choose to cut the potatoes, each piece should have 2-3 buds (sprouts) to ensure proper growth. The recommended spacing is as follows:
- Small cut pieces: 25 cm apart
- Medium-sized pieces: 30-35 cm apart
- Large whole tubers: 45-50 cm apart
Cutting tubers is useful when planting material is limited, for rapid seed multiplication, or to save costs. It also allows growers to identify and remove diseased tubers that may appear healthy externally.
Using Manure and Wood Ash for Better Growth
Before planting, manure can be added to the prepared furrows if it was not incorporated earlier. Another beneficial addition is wood ash, which is rich in minerals, particularly potassium and calcium. These nutrients improve plant immunity, enhance yield potential, and increase starch content in the tubers, making them tastier. Additionally, wood ash acts as a natural pest repellent.
To use ash effectively, follow these guidelines:
- Sprinkle 1 kg of ash per 25 kg of potatoes before planting.
- If cutting tubers, dust the cut surfaces with ash to speed up healing and prevent rot.
- Ash should be buried slightly in the furrow to prevent direct contact with the tubers, as prolonged exposure can cause burns.
- Avoid using ash simultaneously with nitrogen-rich artificial fertilizers, as it can cause a chemical reaction that reduces nitrogen availability.
- Only use pure wood ash, preferably from willow or birch, as these trees provide the most beneficial mineral balance.
Mulching and Weed Control
After planting, cover the tubers with 5-6 cm of soil. Proper care during the growing season is crucial for achieving a high yield. Key cultivation practices include inter-row cultivation, mulching, and weed control.
Mulching is done when plants reach 15-20 cm in height, creating sufficient space for root and stolon development. Using organic mulch, such as straw, hay, or dry leaves, helps retain soil moisture, suppress weeds, and promote healthy plant growth.
Applying a thick layer of mulch between rows has numerous benefits:
- Retains moisture for longer periods
- Suppresses weed growth
- Maintains soil temperature
- Enhances tuber development
Dry leaves, readily available in forests or gardens, serve as an excellent, cost-effective mulch. Over time, mulch decomposes, enriching the soil with organic matter. To maintain its effectiveness, additional mulch can be applied throughout the season.
Staggered Planting for Better Results
For optimal yields, consider staggered planting, meaning potatoes are planted in multiple stages. This approach accounts for unpredictable weather conditions and helps extend the harvest period. Early-planted potatoes will be ready for harvest sooner, while later-planted ones will develop under more favorable conditions, avoiding late frosts and improving overall quality.
To achieve large, high-quality tubers, potatoes can be hilled up two more times during their growth cycle. This practice enhances root development and increases yield potential.
Final Thoughts
This guide has covered the entire process of growing potatoes—from soil preparation, planting, and fertilization to mulching and pest prevention. By following these steps and adapting them to your specific conditions, you can achieve healthy plants and high yields.
For timely gardening tips and additional advice on protecting potatoes from late blight and pests, be sure to follow our channel. We will provide updates at the appropriate times to help you maintain a successful and productive garden!